
Struggling to find the best way to clean your RV’s black tank? The best approach is a simple, step-by-step routine. As a professional who manufactures restroom trailers and regularly uses RVs, I’ve seen how proper cleaning prevents odors, clogs, and sensor issues.
In this blog, I’ll show you how to keep your RV’s black tank clean and working properly.

Understanding the Black Tank
Before we proceed to the step-by-step cleaning process, let me explain the black tank briefly. It stores toilet waste, urine, and toilet paper, while your RV’s gray tank handles wastewater from sinks, showers, and the kitchen. Knowing the difference helps you take care of your tanks properly.

Why Regular Blank Tank Maintenance Matters?
Regular maintenance of your black tank is important to keep your RV clean, safe, and working properly. When the tank is not cleaned regularly, it can cause blockages and bad odors, and may lead to damage and repairs. Here are the reasons why maintenance matters.
1. It Prevents Build Up of Waste
Solid waste and used toilet paper can build up inside the tank, especially near the outlet. Over time, this can form a hard pile of human waste that will cause blockages that prevent the pipe from draining properly. Regular cleaning and proper black tank treatment help break down waste and keep the tank running smoothly.
2. Accurate Sensor Reading
A tank sensor is a device that shows whether your black tank is full or empty. These sensors work when liquid comes into contact with it. But when waste or toilet paper sticks to the sensor probes, it can create a false signal and read it as full even if it’s not or still empty. This is why keeping the tank clean is very important to avoid residue from building up around the sensor and to have an accurate reading.

3. Odor Control
This is one of the main reasons why you should clean your black tank regularly. A dirty and unmaintained black tank produces a bad smell that can spread all over your RV. Proper maintenance and the right RV black tank treatment can prevent bacteria from multiplying that cause a bad smell, which in turn will keep your RV clean and smelling fresh.
4. Protecting your Dump Valve
The dump valve, or gate valve, is the exit point for emptying your black tank. If debris gets stuck or if there’s a buildup of waste, it may cause leaks or make the valve difficult to open and close. With proper maintenance, you can prevent these issues and keep the valve functioning smoothly.
Quick Tips:
Make Sure You Use Enough Clean Water:Always flush with plenty of water after you dump or defecate to help break down the waste.
Pick RV-Safe Toilet Paper: Use toilet paper that’s RV-friendly and that dissolves quickly.
Try RV Black Tank Treatments: Using enzymes or chemical treatments can help break down waste and cut down on odors. Just be sure to follow the instructions on the box when you use them.
Must Have Tools and Supplies
Prior to cleaning your RV’s black tank, having the right tools makes the process safer, faster, and more effective. Here’s what I recommend and why each item matters:
1. Assortment of Sewer Hose Adapters
You’ll need these to connect your RV to different dump stations. Not all stations have the same fittings, having a few options ensures a secure and leak-free connection.
3. Various Lengths of Sewer Hose
This depends on where you park your RV, the dump station might be close or far, so having hoses of different lengths gives you flexibility and helps you avoid stretching or kinking the hose.
4. RV Sewer Hose Support
A support helps maintain the proper slope for your hose, which makes it easier for the waste to flow out. This is especially helpful at high dump stations or uneven terrain.

5. See-Through Sewer Adapter
This one is the most useful tool. By using this, you’ll know if your tank is completely flushed out and clean when the water runs clear. It takes the guesswork out of cleaning.
6. Black Tank Treatment
In my case, I always use a black tank treatment after flushing. That’s why I highly recommend having it, as it helps break down waste, control odor, and keep your tank sensor working properly.
7. Disposable Rubber Gloves
Gloves are a must-have for hygiene. You’ll be handling hoses and tanks, and a good pair of gloves keeps you protected from germs and bacteria.

8. Face Mask
Trust me, even with careful handling, odors can escape. A face mask makes the cleaning process much more comfortable.
9. Dedicated Garden Hose
Use a separate hose only for flushing your black tank. This will prevent contamination of your regular garden hose and ensure a strong, clean flow of water for rinsing.

Step-by-Step Procedure on How to Clean an RV Black Tank
Cleaning your black tank doesn’t have to be complicated. If you follow these steps carefully, your black tank will be thoroughly clean every time. I’ve used this method many times, and it works consistently.
Step 1: Prepare the Night Before
Close your gray tank valve the night before. This stores water in the gray tank for rinsing the sewer hose later.
Step 2: Clean the Toilet Thoroughly
Scrub your toilet and flush it several times. Cleaning the toilet first will remove leftover waste and make flushing the RV’s black tank easier.

Step 3: Connect the Flush Hose
Attach the anti-backflow valve to the end of your dedicated garden hose. Connect your sewer hose to the black tank flush inlet using the proper sewer hose adapters to ensure a secure fit. Attach a see-through adapter so you can monitor the water during flushing.
Support your hose if needed to maintain the correct slope and prevent kinks or spills. Make sure all connections are tight before turning on the water.
Step 4: Dump the Black Tank
Open the black tank valve slowly and let all the waste drain. Make sure the flow is smooth, and nothing is left behind. After the tank is fully emptied, close the black tank valve before adding water again.
Step 5: Fill your Tank with Fresh Water
Refill your black tank with clean water until it is about ¾ full to help loosen any remaining waste. Do not overfill to avoid spills.

Step 6: Flush the Tank
Open the black tank valve and let it drain completely. Refill the tank again with clean water and repeat the process until the water runs clear. In my experience, three rinses are usually enough. A see-through sewer adapter will help you confirm if the tank is fully clean.
Step 7: Close the Black Tank Valve
Once the water is clear, close the black tank valve securely.
Step 8: Rinse the Sewer Hose with Gray Water
Open the gray tank valve to rinse the sewer hose. The soapy gray water removes any leftover residue inside the hose.
Step 9: Add the Black Tank Treatment
Add a small amount of water, about 10% of your RV black tank, then pour in your desired tank treatment. Follow the manufacturer’s instructions, as treatment may be liquid, powder, or pods.
Let it sit until your next cleaning. This keeps waste manageable, controls odors, and protects tank sensors. Once done, close the valve, and you are ready to go!

Deep Cleaning Your RV Black Tank
On the other hand, if you want your RV’s black tank to get a deep clean, here is the procedure you must follow. This method targets hardened buildup, persistent odor, and sensor residue that regular rinsing may miss.
1. Dump the Black Tank Completely
Open the black tank valve and drain all the waste completely. Allow the tank to empty fully for several minutes. Make sure the sewer hose is securely attached before dumping. A tight connection prevents leaks and contamination.
2. Close the Valve
Once the tank is empty, close the valve tightly. You need the valve closed so the tank can hold water for soaking.

3. Fill Tank with Fresh Water
Fill the tank with water until it reaches about ¾ full. Avoid overfilling to avoid overflow. This level allows water to cover the interior surface properly. Good coverage helps soften hardened waste.
Tip: Set a timer on your phone for 5-8 minutes so that you don’t forget the tank is filling.
4. Add Black Tank Treatment
Add one bottle or the recommended amount of black tank treatment. Always follow the manufacturer’s instructions. Treatments may come in liquid, powder, or pod form.
5. Let It Sit and Work
Allow the solution to sit for 24 to 48hours. This soaking time will help loosen stubborn buildup inside the tank. If possible, drive your RV during this period. The movement helps the solution reach all interior surfaces.

6. Dump the Tank after Soaking
After soaking, open the valve and drain the tank completely. You may notice darker discharge as the residue flushes out.
7. Rinse Thoroughly
Refill the tank with clean water and drain it again. Repeat this process two to three times. Continue rinsing until the water runs clean. Clear water is a good sign that the tank is thoroughly cleaned. Always closed the black tank valve when finished.
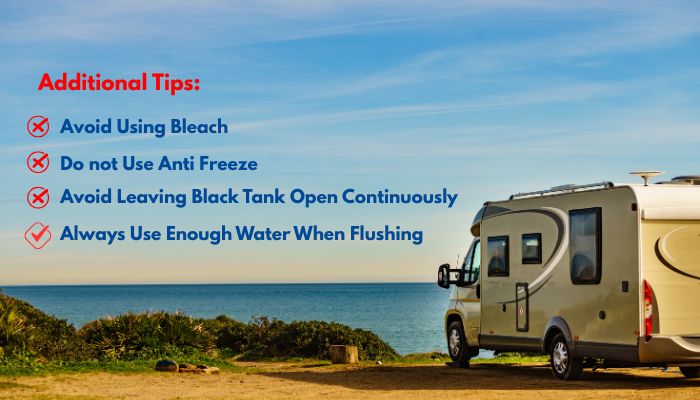
Pro tips:
Deep cleaning at least twice a year keeps your RV’s black tank in better condition and extends its lifespan.
Frequently Asked Questions (FAQs):
1. How do you get rid of a poop pyramid in an RV black tank?
Use a bacteria and enzyme-based black tank treatment. Fill the tank and let it sit for about 72 hours.
If the buildup is stubborn, use a tank wand like a wiggler stick to spray high-pressure water down the toilet. This helps you to break apart the poop pyramid and loosen hardened waste inside the tank.
2. How often should you clean your RV’s black tank?
The cleaning schedule depends on how often you use your RV bathroom and how many people use it. Do a deep clean after every trip. During summer, monthly cleaning works well; in winter, every other month is sufficient.
Deep clean and deodorize at least twice a year to keep the tank functioning properly and the sensor accurate.
3. Is vinegar safe for RV black tanks?
Vinegar is safe for seals, but does not break down solid waste effectively.
4. What is the best homemade RV black water tank cleaner?
Use the Geo Method; mix 2 cups Pine-Sol, 2 cups Calgon, and 5 gallons of water. These solutions will help to keep the tank slippery, which prevents waste from sticking and reduces odor buildup.
5. What is the best chemical to clean an RV’s black tank?
Enzyme-based cleaners work best to break down waste and toilet paper naturally. Popular options include Odorlos, Thetford Aquamax, Camco Rhino, and RV Digest It Ultra.
For more information, check my blog where we review these products to help you choose the right one.
Conclusion:
Keeping your RV black tank clean doesn’t have to be stressful. By following these steps and maintaining a regular schedule, you will prevent odor, avoid clogs, and keep your tank working smoothly. Trust me, once you get into the routine, your RV trips become much more enjoyable.

Check out this related post:
Best RV Black Tank Treatment: 2026 Review Guide
What is the Blue Liquid in Porta-potties?
Avoid the Overflow: How Often Portable Toilets Should Be Emptied
Why You Should Never Use Bleach in a Portable Toilet
A Beginner’s Guide to Portable Toilet Chemicals and Safe Use

